
Here's another magnificent piece of joinery. Carpentry? Woodwork? Or just hacking about and bodging together some bits of wood. Bodging - well maybe not exactly. To me, bodging is the art of making desperate but semi-effective repairs when construction goes awry, often when you're in the finishing straight. Sometimes nobody notices.
This shelving unit isn't exactly that. In fact, the finished article is almost exactly as designed (on the back of a used envelope). Parts of it went together far more smoothly than I ever expected. There's one small example of cock-up, round the back, where a panel pin hammered in to the back board came down through the shelf rather than straight in. But I managed to extract it and repair the damage seamlessly. Yes, that's bodging.
Let's not be silly, I was always trying to build this as neatly as possible. The reason it felt somewhat like hackery is the bits-and-pieces nature of it. If you look closely, it may well seem to be over complicated, but there's a good explanation. The thing is, I have a lot of lengths of timber stacked up in my garage, shaming me every time I go in there, because they're all evidence of past projects which never happened. So, faced with a need for a shelf unit I wanted as much as possible to use wood I already had, even though I'd bought various sizes/widths for quite different designs.
Those shelves are quite deep front to back, but they're actually the same pieces as used in my fabulous Zoom bookcase which you can just see perched on the mantelpiece above. I bought a lot of them for another large bookcase project ha ha. I decided I could join two together for each larger shelf, provided I could sand down the curved 'front' edge on the ones which would go to the back. I've learnt how strong this wood glue is, when you make sure the joining sections are pressed close. I've also learnt that these particular shelves are stronger than average and aren't likely to bend. Unless I do something stupid like using the unit to store concrete blocks.
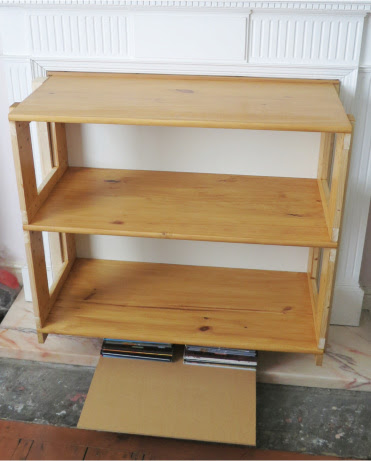
Second picture: near the end of assembly, and the legs are going on last. I guess the reason is obvious? The unit is totally bespoke, ie. it can't go anywhere else. The thing is, I don't use this particular fireplace, which leaves me with some unused wall space, and an ugly dark hole, so to speak. I reckoned a unit like this would solve the problem. It fits perfectly into the recess (and could be easily removed if the fireplace ever came into use again). You will have noticed that it extends beyond the edge of the marble(?) hearth; hence the front legs have to be longer than the back ones. So, perched on books and bits of wood, and with prolonged use of a spirit level, I gradually figured out the required lengths of leg and cut them to fit. And then applied the last coats of varnish.

Hmm, yes, it could be used elsewhere, couldn't it, by chopping off the extra length of the front legs. Though will anyone actually do that? We live in an age when most people don't bother to reuse stuff, they just throw away what's not wanted and buy something new... I'd like to think those consumerist attitudes are changing a little. Maybe this unit will ultimately be thrown in a skip. But I'd be very happy if for instance it later did some time in a shed, storing half used pots of paint and such.
So, job done. Very satisfying, now I look at it. In fact, the whole room has become tidier, because it's led me to clear the clutter off the tops of other furniture. My head feels better now the fumes from the varnish have faded away. The place feels just that bit less like a tip, and generally more civilised.
Comments
Post a Comment